CHAPTER TWO
MASTERING WALKACTIVE
Page 29. The key to getting results lies in the detail - it is vital to get the technique right. And this takes practice - lots of practice. But this doesn't mean you have to set aside hours of walking time. In fact, it is best to do your Walkactive pracice sesions in really small chunks at first, as short as ten or fifteen minutes at a time, with each session focusing on one body part - the 'skill-layering' approach.
CHAPTER TWO MASTERING WALKACTIVE Page 30
READY, STEADY, WALK!
So let's now take a look at exactly what it is you need to do.
Technique Walks
I want you set aside ten or fifteen minutes, ideally 3 times per day, every day. During these sessions, you are going to practise working on each of the four body parts; feet, hips, neck & shoulders, arms; one at a time, until you've mastered all of them. These sessions are your Technique Walks. To master Walkactive it's absolutely vital to set aside time purely to focus on your technique. Of course, how fast you master each of the individual Walkactive body parts will depend on how often your practice, but there are other factors too, such as your fitness or your connection to your body. The bottom line is that you should keep doing your Technique Walks until you feel you've really got it right.
To start your Technique Walks, all you need to do is put on a pair of flat, trainer-style flexible shoes (or go barefoot) and go outside, outdoor. Ideally, u=you want to be on a flat-ish surface - the park or a level pavement is best. You start with your feet and when you feel you've mastered your Walkactive feet - and that could take several Technique Walks - only then should you move on to your hips, and so on. Try not to rush too quickly from one body part to the next. It's really tempting, but it won't work in your favour. At the very least, focus on one body part per day. The more time you take to perfect and connect with each stage of the process, the more benefits you'll see.
Finally, don't be tempted to skip these Technique Walks altogether, and just bung it all altogether. If you do, you'll never see the true real Walkactive benefits, because you'll never get it right. Take your time - and have fun with it.
Not Just Simple Addition
FEET X HIPS X NECK & SHOULDERS X ARMS = WALKACTIVE
I think that mastering the four parts of Walkactive isn't just about making your walk four times better. As you master each body part ( the feet, hips, neck and shoulders, and arms), you naturally multiply the benefits to the others you have already learned. And the more time you take over improving each part, the greater the benefit will be to the rest of your body, not to mention your mind, heart, and soul. In other word, with Walkactive, the sum of the parts is greater than the whole. Learning to walk this way is deeply rewarding, whatever stage of life you're at. And it can be rather addictive.
FEET X HIPS X NECK & SHOULDERS X ARMS = WALKACTIVE
Let's look at exactly what you are aiming for with each body part.
Page 31
Technique 1 : your feet.
Aim: to stop passive foot strike and achieve an active foot and open ankle.

⇧ passive foot strike ......................active foot and open ankle⇧
Payoff: improves balance; kick-starts correct alignment into the knee and so helps to protect your joints; jump-starts your body-shape change as you start using the correct muscles.
How to do it.
At this point you should try not to worry about anything other than how your feet are moving as follows:
Be aware of the various foot parts: as you start to put one foot in front of the other notice each of your feet's component parts.
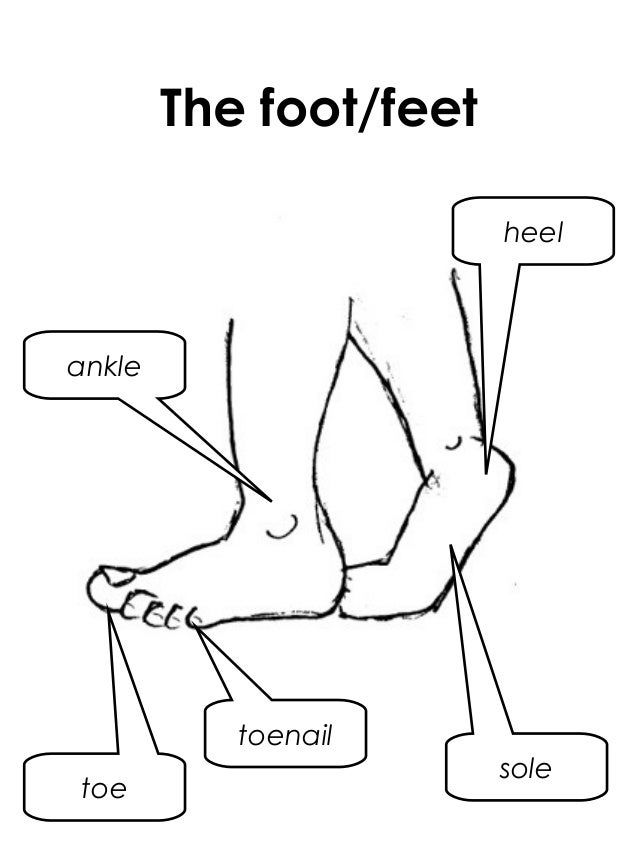
Every time you put a foot down, observe your heel, foot arch, ball of the foot and the toes. Each part has an important role to play.


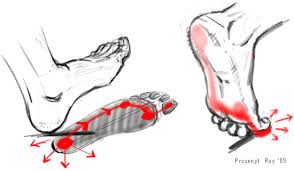
Roll the foot: keep rolling through each foot as you walk, in a fluid action. Feel how your foot starts to become more 'active' than 'passive'. When your foot is passive, it hits the ground in one go as a single unit. When it's active, the different parts touch down as you roll through from heel to toe.


Soften the foot: think of your foot becoming more pliable as you gently roll through it. Imagine it is made of plasticine that has been left on a windowsill all day in the sun. If you picked it up it would be soft and pliable and you could mould it easily in your hand.
Spread the foot: you might feel that the ball of your foot wants to spread inside your shoe - this is good!

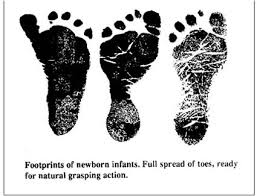
Start to appreciate the breath of your foot. If your shoes area little tight-fitting, you may feel restricted here, but as your foot begins to spread, keep it soft and see if you can focus on propelling your body forward. Think of your body as a canoe: if you want the canoe to travel forward you pull the paddle past your body, then push the water behind you. As you do so, the canoe (your body) moves forward. Think of your feet as the paddles moving you smoothly forward.

⇧ tight shoe do not allow foot spread. ⇧foot spread.
Page 32
Aim for active toes: now see if you can become aware of your big, muddle and little toes .
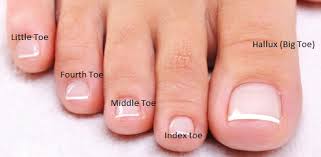
Start to feel these three areas with each step. As your foot is rolling forward, think of pushing evenly off your big toe, middle toe and little toe.

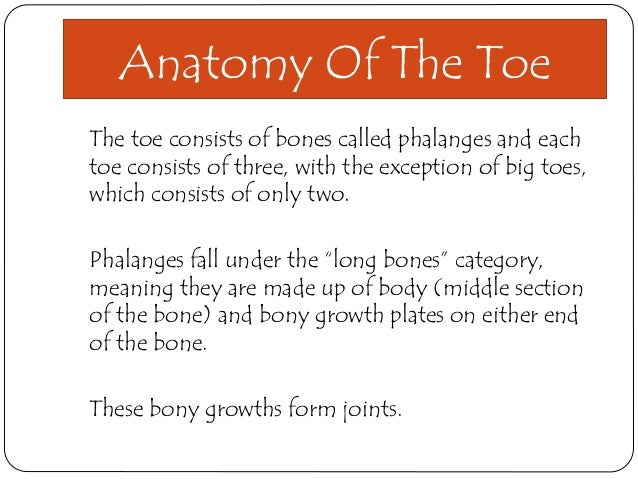

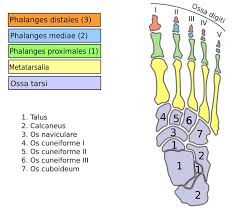
(See 'Why your toes matter', below.)
Be aware of your heel strike: as your body starts to get used to this new way of walking, you'll see that the contact point between your heel and the ground is changing too. If you notice that your heel touches down on the pad rather than the edge, that is good!
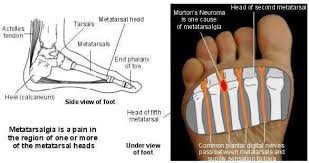
It helps to minimise the impact on your joints, as you have more cushioning on the pad of the heel and the impact is distributed over a greater surface area than if your heel hits the ground on its rim.

Aim for 'open' ankles : as your foot starts to become more active, you'll begin to notice that your ankle joint moves more too - you'll start to feel the front of your ankle opening up as you roll through your foot.
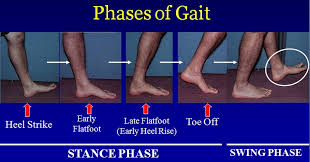

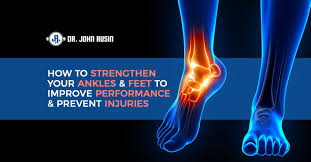
This 'open' ankle is a really important part of your technique. It will help to lengthen your leg muscles, streamline your thighs and kick-start the contraction of the muscles in your bottom. Make sure you don't bring your foot off the floor in a rush. Peeling your foot off the ground slowly helps to achieve an open ankle and stops you from rushing. So make this your mantra: feel the peel!


Page 33
Why your toes matter.
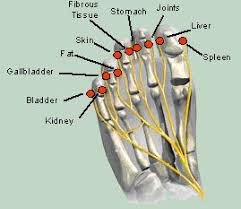
Feeling each of the big, middle, and little toes will help your foot to touch the ground evenly. This encourages correct alignment all the way up through your foot, knee and hips, which, in turn, helps you to engage the correct muscles in your bottom and the backs of your thighs. This doesn't just tone you up, transforming the way you look, it also helps your knee joints to stay healthy by keeping your knees aligned correctly. Isn't it amazing what toes can do?


'When i started Walkactive I found it quite easy to get an active foot, but getting the open ankle was harder. However, when I started to feel my ankles open up more, I noticed that the muscles in my whole leg started to feel like they were lengthening too. This also improved my pace - and then I began to feel my bottom muscles working more too! I couldn't believe that all this could come from one little ankle!' MEROPE, 35, AFTER A BESPOKE WALKACTIVE SESSION.
MASTERING WALKACTIVE
Page 29. The key to getting results lies in the detail - it is vital to get the technique right. And this takes practice - lots of practice. But this doesn't mean you have to set aside hours of walking time. In fact, it is best to do your Walkactive pracice sesions in really small chunks at first, as short as ten or fifteen minutes at a time, with each session focusing on one body part - the 'skill-layering' approach.
CHAPTER TWO MASTERING WALKACTIVE Page 30
READY, STEADY, WALK!
So let's now take a look at exactly what it is you need to do.
Technique Walks
I want you set aside ten or fifteen minutes, ideally 3 times per day, every day. During these sessions, you are going to practise working on each of the four body parts; feet, hips, neck & shoulders, arms; one at a time, until you've mastered all of them. These sessions are your Technique Walks. To master Walkactive it's absolutely vital to set aside time purely to focus on your technique. Of course, how fast you master each of the individual Walkactive body parts will depend on how often your practice, but there are other factors too, such as your fitness or your connection to your body. The bottom line is that you should keep doing your Technique Walks until you feel you've really got it right.
To start your Technique Walks, all you need to do is put on a pair of flat, trainer-style flexible shoes (or go barefoot) and go outside, outdoor. Ideally, u=you want to be on a flat-ish surface - the park or a level pavement is best. You start with your feet and when you feel you've mastered your Walkactive feet - and that could take several Technique Walks - only then should you move on to your hips, and so on. Try not to rush too quickly from one body part to the next. It's really tempting, but it won't work in your favour. At the very least, focus on one body part per day. The more time you take to perfect and connect with each stage of the process, the more benefits you'll see.
Finally, don't be tempted to skip these Technique Walks altogether, and just bung it all altogether. If you do, you'll never see the true real Walkactive benefits, because you'll never get it right. Take your time - and have fun with it.
Not Just Simple Addition
FEET X HIPS X NECK & SHOULDERS X ARMS = WALKACTIVE
I think that mastering the four parts of Walkactive isn't just about making your walk four times better. As you master each body part ( the feet, hips, neck and shoulders, and arms), you naturally multiply the benefits to the others you have already learned. And the more time you take over improving each part, the greater the benefit will be to the rest of your body, not to mention your mind, heart, and soul. In other word, with Walkactive, the sum of the parts is greater than the whole. Learning to walk this way is deeply rewarding, whatever stage of life you're at. And it can be rather addictive.
FEET X HIPS X NECK & SHOULDERS X ARMS = WALKACTIVE
Let's look at exactly what you are aiming for with each body part.
Page 31
Technique 1 : your feet.
Aim: to stop passive foot strike and achieve an active foot and open ankle.
⇧ passive foot strike ......................active foot and open ankle⇧
Payoff: improves balance; kick-starts correct alignment into the knee and so helps to protect your joints; jump-starts your body-shape change as you start using the correct muscles.
How to do it.
At this point you should try not to worry about anything other than how your feet are moving as follows:
Be aware of the various foot parts: as you start to put one foot in front of the other notice each of your feet's component parts.

Every time you put a foot down, observe your heel, foot arch, ball of the foot and the toes. Each part has an important role to play.
Roll the foot: keep rolling through each foot as you walk, in a fluid action. Feel how your foot starts to become more 'active' than 'passive'. When your foot is passive, it hits the ground in one go as a single unit. When it's active, the different parts touch down as you roll through from heel to toe.

Soften the foot: think of your foot becoming more pliable as you gently roll through it. Imagine it is made of plasticine that has been left on a windowsill all day in the sun. If you picked it up it would be soft and pliable and you could mould it easily in your hand.
Spread the foot: you might feel that the ball of your foot wants to spread inside your shoe - this is good!
Start to appreciate the breath of your foot. If your shoes area little tight-fitting, you may feel restricted here, but as your foot begins to spread, keep it soft and see if you can focus on propelling your body forward. Think of your body as a canoe: if you want the canoe to travel forward you pull the paddle past your body, then push the water behind you. As you do so, the canoe (your body) moves forward. Think of your feet as the paddles moving you smoothly forward.
⇧ tight shoe do not allow foot spread. ⇧foot spread.
Page 32
Aim for active toes: now see if you can become aware of your big, muddle and little toes .
Start to feel these three areas with each step. As your foot is rolling forward, think of pushing evenly off your big toe, middle toe and little toe.


(See 'Why your toes matter', below.)
Be aware of your heel strike: as your body starts to get used to this new way of walking, you'll see that the contact point between your heel and the ground is changing too. If you notice that your heel touches down on the pad rather than the edge, that is good!
It helps to minimise the impact on your joints, as you have more cushioning on the pad of the heel and the impact is distributed over a greater surface area than if your heel hits the ground on its rim.
Aim for 'open' ankles : as your foot starts to become more active, you'll begin to notice that your ankle joint moves more too - you'll start to feel the front of your ankle opening up as you roll through your foot.
This 'open' ankle is a really important part of your technique. It will help to lengthen your leg muscles, streamline your thighs and kick-start the contraction of the muscles in your bottom. Make sure you don't bring your foot off the floor in a rush. Peeling your foot off the ground slowly helps to achieve an open ankle and stops you from rushing. So make this your mantra: feel the peel!
Page 33
Why your toes matter.
Feeling each of the big, middle, and little toes will help your foot to touch the ground evenly. This encourages correct alignment all the way up through your foot, knee and hips, which, in turn, helps you to engage the correct muscles in your bottom and the backs of your thighs. This doesn't just tone you up, transforming the way you look, it also helps your knee joints to stay healthy by keeping your knees aligned correctly. Isn't it amazing what toes can do?
'When i started Walkactive I found it quite easy to get an active foot, but getting the open ankle was harder. However, when I started to feel my ankles open up more, I noticed that the muscles in my whole leg started to feel like they were lengthening too. This also improved my pace - and then I began to feel my bottom muscles working more too! I couldn't believe that all this could come from one little ankle!' MEROPE, 35, AFTER A BESPOKE WALKACTIVE SESSION.

No comments:
Post a Comment